I don't think my kids have done much with nets before. It's important to be able to represent 3D objects in this way. I was keen to see what they could do so we got out some equipment to have a play. Here are a few of the 3D objects we looked at and some of the drawings the kids did: Cube
Suggestion #1 - like a rectangle with a square off the side.
Suggestion #2 - Like a cross
Suggestion #3 - lots of square bits
Suggestion #4 - A cross made up of 6 smaller squares
So we had the general idea that the net of a cube is made up of lots of squares - just not too sure about the details. Tetrahedron
Suggestion #1 - it's a triangle with some stripes
Suggestion #2 - it's got more than 1 triangle
Suggestion #3 - think I've seen one before with a square and triangles coming off it
So we don't really have a very good idea about this one. Lots of opportunity to learn here. Cylinder
Suggestion #1 - it's got 2 circle shapes on top of each other
As teachers, we learn so much from the "fails" of our students. The "correct" responses are fine but they don't in themselves give us much insight into the mathematical thinking of the students. BUT the errors, the mistakes, the ones that aren't quite right - they are the ones that tell us so much about what our kids are thinking and how they "see" mathematics.
I was at the Canberra Maths Association conference a few weeks ago and saw this really simple idea from Maria Quigley from the University of Sydney. When making models of 3D objects, Maria used those really jumbo sized plastic straws you get at some "bubble tea" outlets. They are useful because you can pass a string through the straw (several times if needed) and tie your shapes together. So I had a go in my classroom. I bought a few packs of these straws, which are available pretty cheap at some $2 shops. We all sat down and had a go at making a tetrahedron. Here are a few of our results:
Note - collaboration; when we work together we learn so much more.
They all looked pretty good when I hung them up.
But of course I am an annoying teacher. I wasn't prepared to let it rest at that. So I started asking some questions. "What if....?" "And if we got 2 of them and....?" "And could you...?" And suddenly the kids were making some discoveries, like: "Hey, I can't make this cube stay up." "Is this a triangular prism?" "What do you call this shape when you put two tetrahedra together?"
And then they started to construct models of objects I had no idea what to call. This is how we learn.
Our exploration of shape moved into a new dimension today - the third dimension. Yes - we were looking at 3D objects. A great way to consolidate concepts is to construct a t-chart to highlight similarities and differences. This is what we did. We took out the 3D models and, working in small groups, looked at the features and properties of the object in front of us. We took photos on our iPads, labelled them and discussed, faces, edges and vertices. Once we were happy with this, we went and looked at a second 3D object for purposes of comparison. Using this information we constructed our t-charts:
A bit simplistic but covers the main ideas
A bit more detail on this one about how many of each type of face
Nicely presented
Love the contrast of using black
We had the conversation about the "bottom" face being called the base
Another very nice presentation
And of course there was also a movie made using Educreation...
And so another happy day "playing" with our iPads - and getting into some understanding of concepts that underlie basic geometry.
We'd been looking at volume and capacity in class for a few days and I came across an activity in an old book that I bought for $2 at the Lifeline bookfair.
Mathematics for Elementary Teachers - an activity approach
The Task
So the task was to get a 16 x 16 grid and make a series of regular prisms that have a square base.
Here's what it looked like:
Shape 1 = 14cm x 14cm x 1cm
Shape 2 = 12cm x 12 cm x 2cm
Shape 3 = 10cm x 10cm x 3cm etc The kids were able to see a pattern emerging. Each time you increased the height by 1cm, the sides of the base decreased by 2cm.
They were able to construct a series of 7 shapes:
Yes - it got a bit messy...
Eventually we all had a set of shapes.
What Next?
The task then was to arrange these shapes in order from smallest to largest without actually measuring them or doing any calculations.
Here's what a few pictures of what the kids thought...
To help us discuss the activity, we decided to name each shape after its height. So Shape 1 has a height of 1cm, Shape 2 had a height of 2cm etc.
Here are a few comments from the kids about what they noticed when they tried to order the shapes:
-->
We think they are all the same.
Shape 1 would be the largest because it is
long and has the space of the tallest one. I’m just wondering if they would
almost be the same since they has the same squares building it.
I reckon if you have a smaller base the
sides get bigger. If you get a bigger base you get smaller sides. The one with
the biggest base is the biggest shape because you are losing squares each time
you fold the edge up.
I’m not exactly sure about Shape 6
Having the biggest base doesn’t mean you
have the biggest capacity. Just like if you have the tallest height it isn’t
going to have the biggest capacity.
I found this really interesting because I
thought that shape 4 was going to be the biggest. I also found it interesting that we used the
same sized piece of paper for every shape.
I found that the largest shape in length
isn’t necessarily the shape that has the largest volume.
I found it interesting because the capacity
of the shape went up then down. I thought that Shape 4 would be the biggest
because it had a big area (base) and was quite high.
I found that the tallest shape will not necessarily
have the larger amount of volume.
Doing Some Calculations
So finally we decided to do actually work out the capacity of each shape. Some kids chose to use some of the base-10 blocks to work this out.
When we had finished, we drew up a table of data:
Now this was really interesting. Starting with Shape 1, the capacity increases for Shapes 2 and 3, then it starts to go down. This is not what any of us was expecting.
Then we began to wonder.
Is the height of 3cm going to give us the biggest capacity?
What if we try 3.1cm? Or 2.9cm? Will they both be smaller than 3cm?
So we did a bit a table:
And constructed a graph of this data:
And that was really interesting. And the kids started asking, "What if we try somewhere between 2.6cm and 2.7cm? What about 2.65cm?"
This was my last day at Aoki-Chuo school in Kawaguchi. My visit has been brief but has had a huge impact on my thinking - in fact I'm still thinking about my thinking, if that makes sense. Anyway, today I was privileged to sit in on several fantastic lessons but I really want to share this one with you.
Topic - Finding Volume of Irregular 3D Shapes
Link to Previous Learning: The class had been looking previously at how to work out the volume of regular cubes and rectangular prisms. The teacher presented this diagram:
There was a brief discussion about this shape along the lines of how it was similar to and different from the previous shapes that the class had worked with. Everyone seemed happy with what they could see. Problem Solving Strategies: Then the teacher asked them for some strategies to deal with this shape. Two students had ideas: 1. You can separate the shape into smaller parts 2. You can add different bits of the shape together Even though expressed differently, I think both ideas showed that the kids were looking at the composition of the shape and demonstrated their knowledge of how smaller shapes can be combined to make bigger shapes. This is something that they had done previously in Year 4 with 2-dimensional shapes. Working Independently: The class quickly got down to work. To save time, the teacher had prepared multiple copies of the diagram, drawn to a scale of 1:1. This was really helpful - no time spent on doing activities that were not related to the topic. Yes - drawing shapes is a great skill to learn - but not in this lesson. The focus here was always going to be on finding the volume. The teacher circulated and talked with different children. Once they had a solution, they were encouraged to get another copy of the diagram and work it out another way. Presentation: The teacher selected several children who had different strategies and asked them to prepare a presentation for the class. This involved getting some A3 paper with a copy of the diagram (already prepared by the teacher) to write up their solution. Method 1:
A simple cut divides the shape into two manageable pieces. Works well and gets an accurate solution. Note the use of colour in the diagram to highlight the relevant calculations. This was done by the teacher after the presentation when she was clarifying with the students what was going on. Method 2:
In this solution, the student decided to chop off the top part and add it to the end of the remaining rectangular prism. This works neatly because the base of the chopped off part is 4cm x 6cm, same as the end of the bigger rectangular prism. Neat match! There was some confusion and almost disbelief - some students wanted clarification on how this worked. So the teacher pulled out a model of the shape to show them.
I think she was holding back on showing this model because she didn't want to shape the children's thinking. Personally, I think I might have got the model out earlier or at least got the kids to make the model for themselves BUT making models wasn't the point of the lesson - everything points back to the topic: "Finding the volume of irregular 3D shapes." Method 3:
This method starts by working out the volume if there was no missing part and subtracting the piece that is gone. Notice once again the use of colour (by the teacher) to show which part of the calculation relates to which part of the diagram. Same and Different: This part of the conversation is always interesting. The two things that children identified were: 1. You had to use multiplication 2. You had to find rectangular prisms Generalisation: "You can find these volumes by looking for cubes and rectangular prisms."
- a very rough translation from the Japanese
So the students now had a strategy to deal with similar problems. The focus wasn't on getting the number answer correct, in fact it was only peripheral to the conversation.
AND
THE WAS NO MENTION ANYWHERE OF A FORMULA.
I think this was pretty significant - that's why I put it in caps
I love the way you can go to your PLN and ask for help and ideas.
And I love being able to help when someone else puts out the call.
So when I got a message the other day from a Twitter follower asking for ideas for promoting inquiry into 3D shapes with a Year 2 class, I was happy to help.
Here's the ideas I came up with. You can probably think of others that you might suggest in the comments section below...
1. I like to refer to 3D shapes as "real"shapes - they exist in reality. Unlike 2D shapes which only exist in the imaginations of geometrists. 2D shapes are not real - they cannot exist in the 3D world. We can see representations of them but everything "real" has depth.
2. Get out some paper shapes - circles, squares, triangles etc to see what shapes the kids can make using flat shapes as faces. And what about if they curve the flat shape, like to make a cylinder? What shapes can't they make? (Have a chat with Mr Mercator about the sphere..) Continue the discussion about nets and how to assemble a 3D shape from a net.
3. Get some solids and paint the faces then print onto white paper. Reassemble a copy of the original solid from the net formed. Try with a sphere haha!
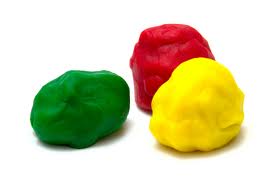
4. Use playdough to make 3D shapes - very tactile and great for kinesthetic kids. Make sure sides and angles are straight with a ruler or flat edge.
5. Do cross sections of prisms etc by cutting playdough with plastic knife of pulling apart the stack made in 4 (above).
6. Use plastic shapes, squares, triangles, circles etc, to make a stack of similar shapes to create a prism - a shape projected through itself. What happens when you lift up half of the stack? What shape do you see in the cross-section?
7. Get kids to group a set 3D shapes - what properties do they have in common? What characteristics can be used to classify them - prisms, pyramids, curved faces etc.
There are lots of ways to explore and investigate 3D shapes. The most important thing is to actually make physical contact with a few of them, not just look at pictures in a textbook.
Have some fun.
And post a comment if you have some other ideas on how to explore 3D shapes.
Here's some suggestions that have come through so far:
Suggestion 1: Imagine you live inside a 3D shape. Design the interior. Next, perform
a mime for the class about living in that shape. Class guesses what
shape you are living in.
Suggestion 2: I
love the feely box activity! Hide a 3D shape inside a box with holes
in the side so a student can insert their hands and feel the shape. The
class ask the student questions to try and guess the shape. The child
with the box needs to feel the shape in order to answer the questions.
Its great to do a number of times to develop the children's questions
and also the terminology they use. ie Does the shape have more than one
right angle? What makes a good question? discussions are good too.


